History (newest on top): 20190608 - Added photos of Einstein quote and link to the sales page on Amazon 20181220 - Einstein calligraphy quote now on Etsy! So, moved this entry from the Coming Soon section to the top in the Products section. 20181212 - first written
END
Keywords: products, manuals, electric rc aircraft guy computa pranksta user manual, electric rc aircraft guy computer prankster user manual
1) How to download and "install" (copy over) the necessary (and pre-compiled) freeroute.jar ("freeRouting.jar") binary.
2) (Briefly): how to use the auto-router to route a couple boards (1 trivial, 1 less trivial), including back-importing the routed boards back into KiCad.
Note: the crux of this demo is done by 6:00! By this point I have shown how to install the freeroute.jar executable file and use the auto-router to route a board! Feel free to stop at this point.
3) How to download the KiCad source code and demo project files (ex: to use as demo tools to test the autorouter).
4) How to work around a minor bug in the autorouter that sometimes makes it not allow you to output the routed board .ses file.
5) How to rename board layers.
6) How to do manual board cleanup, including DRC (Design Rules Check), manual trace modifications and dragging, Interactive Router Settings (very brief mention), board ground fill (brief), and how to fix ground fill problems such as floating fill islands which need to be connected via a few vias and traces.
7) The end-result is a nice, auto-routed board (auto-routing is so convenient!) with minimal hand-cleanup ready to be sent off to the manufacturer.
I'm super happy to have the auto-router working so that I can use it for quick-and-dirty jobs that require a faster design speed and less manual work at the sacrifice of a bit of perfection.
By Gabriel Staples
Written: 6 June 2018
Last Updated: 7 June 2018
Quadcopter navigation algorithm SIL test (live video).
In mechatronics and control theory, testing is an important part of controller validation. You need to run experiments to prove that your software/analog/digital controller, actuator, algorithm, etc, does what it’s supposed to do. Experiments, however, can be expensive, time-consuming, difficult,
dangerous, or even impossible to test under all conditions. Therefore, you can do Hardware in the Loop (HIL) testing and Software in the Loop (SIL) testing/simulation to aid the testing, verification and validation of your controller without having to resort to pure, fully-physical testing with actual products under actual conditions.
I just bought this Velleman desoldering iron/vacuum (desoldering pump) for ~$10 on Amazon. It worked so well I wanted to share my review directly, since it could have saved me dozens of hours and tons of frustration before when I was newer to soldering and trying to desolder through-hole parts with lots of legs, such as switches. It is SUCH a great value and would have prevented me from destroying or damaging several circuit boards in the past!
This Article:
I just upgrade my hard drive to an SSD (Solid State Drive). Now my computer runs soooo much faster! It's usable again! No matter what operating system you have, the following instructions will work, since we will simply be using free and open source, and also no-cost, tools to copy your drive data, byte by byte, from one drive to another. In other words, the copy technique doesn't even read files, as it doesn't know what files are, so it doesn't care what file structure or format you have. It just reads bytes. I'm pretty excited that such great free tools exist. No need to buy Acronis, just do this. How to clone your hard drive:
Buy one of these USB to Gigabit Ethernet adapters for $10, plug it in to your Raspberry Pi 3 and voilá! Your new Pi 3 Ethernet connection is now 3x faster than the built-in Ethernet port and 12x faster than the built-in WiFi adapter (source: see my test results below)!
This really matters when you're using your Pi 3 as a network device, server, router, hotspot, NAS, or remote development machine. Pretty much it really matters whenever you want it to work better on your local or wide area network, which includes ssh-ing or otherwise remoting into it.
The WowGo Electric Skateboard is one of the greatest products I've ever had the privilege of owning. It's a thrill to ride, so much fun, and practical too! I've owned it now for 2 months and have probably already put close to 150 or 200 miles on it. When riding downhill at 22+mph, carving back and forth, I actually get the same sensation I feel when snowboarding--except in this case I can do it right outside my house in my local neighborhood, and all-year-round!
I recently moved to a big city and I have been using my WowGo electric skateboard for the last month to ride to and from the subway station to get to work each day. I also use it for city commuting down-town. The ride to the subway station is just over 3 miles but I can complete it in 9~15 minutes, depending on traffic lights.
Investing time into learning a first (or new) programming language is a seriously-time-consuming endeavor. For me it wasn't something to take lightly, as I knew I'd be investing thousands of hours into any given single language when I began. When people ask which programming languages they should learn or use, a great way to make recommendations is to consider these 3 things:
Popularity
Is it a scripted (interpreted) or compiled language, and how does that affect what I want to do with it?
Which languages are most used in my industry or application?
1) Consider the popularity of languages. The more popular the language, the higher the priority it should be, within reason, since that's what industry uses and that's where you're going to find the most resources, help and support, compatibility with others, and jobs. The TIOBE index is the place to check: "TIOBE programming community index is a measure of popularity of programming languages, created and maintained by the TIOBE Company based in Eindhoven, the Netherlands.[1] TIOBE stands for 'The Importance of Being Earnest' which is taken from the name of a comedy play written by Oscar Wilde at the end of the nineteenth century.[2]" (https://en.wikipedia.org/wiki/TIOBE_index).
My top 3 recommendations are Java, C++, and Python, but not necessarily in that order. When it comes to you and your personal needs, goals, and desires, however, you need to choose for yourself! Here's some tips to help you make that decision.
This article is a "Notes to Self" article. That means I wrote it for my own personal reference and use, with myself as the target audience during drafting, but decided to post it here because I believe it is useful to others too, and I want to reach as many people as possible, not just me.
Ever wanted to have a bootable Linux USB flash drive with a separate, Windows-readable partition for general file storage? Here's how.
By Gabriel Staples
Written: 26-27 May 2016
Posted online: 26 Aug 2017
Updated: 26 Aug 2017
The
Gist of it/The super short version:
-for the experienced
Linux user
Use gparted on a
Linux computer to make 2 FAT32 partitions on the thumb drive.
The partition created first must be for storage, while the 2nd
one must be for the Linux distro you are putting on the Live USB.
Use UNetbootin
on a Linux computer to install your iso file for the Live USB
onto the 2nd
partition you just made above.
Done.
You can now boot from the USB thumb drive, from its 2nd
partition, while its 1st
partition only is
readable and usable by Windows still (as well as by Linux or Mac too
of course).
100% SATISFACTION GUARANTEE: If you've already purchased a Computa Pranksta from me and need expert support, PLEASE CONTACT ME VIA EMAIL FIRST AT THE ADDRESS JUST BELOW[or even better: open up a public issue on my GitHub support page here] so I can help you outbefore you consider leaving a negative review. I'll help you, I promise! Furthermore, the difference between a 3.99 and 4.01 star rating on Amazon is roughly 200% or more in sales! Please consider carefully if you're thinking about leaving less than 4 stars. Again if you have any problems with or questions about the product PLEASE SEEK SUPPORT FROM ME VIA A PUBLIC GITHUB ISSUE ABOVE (PREFERRED) OR EMAIL (ALSO FINE) FIRST.
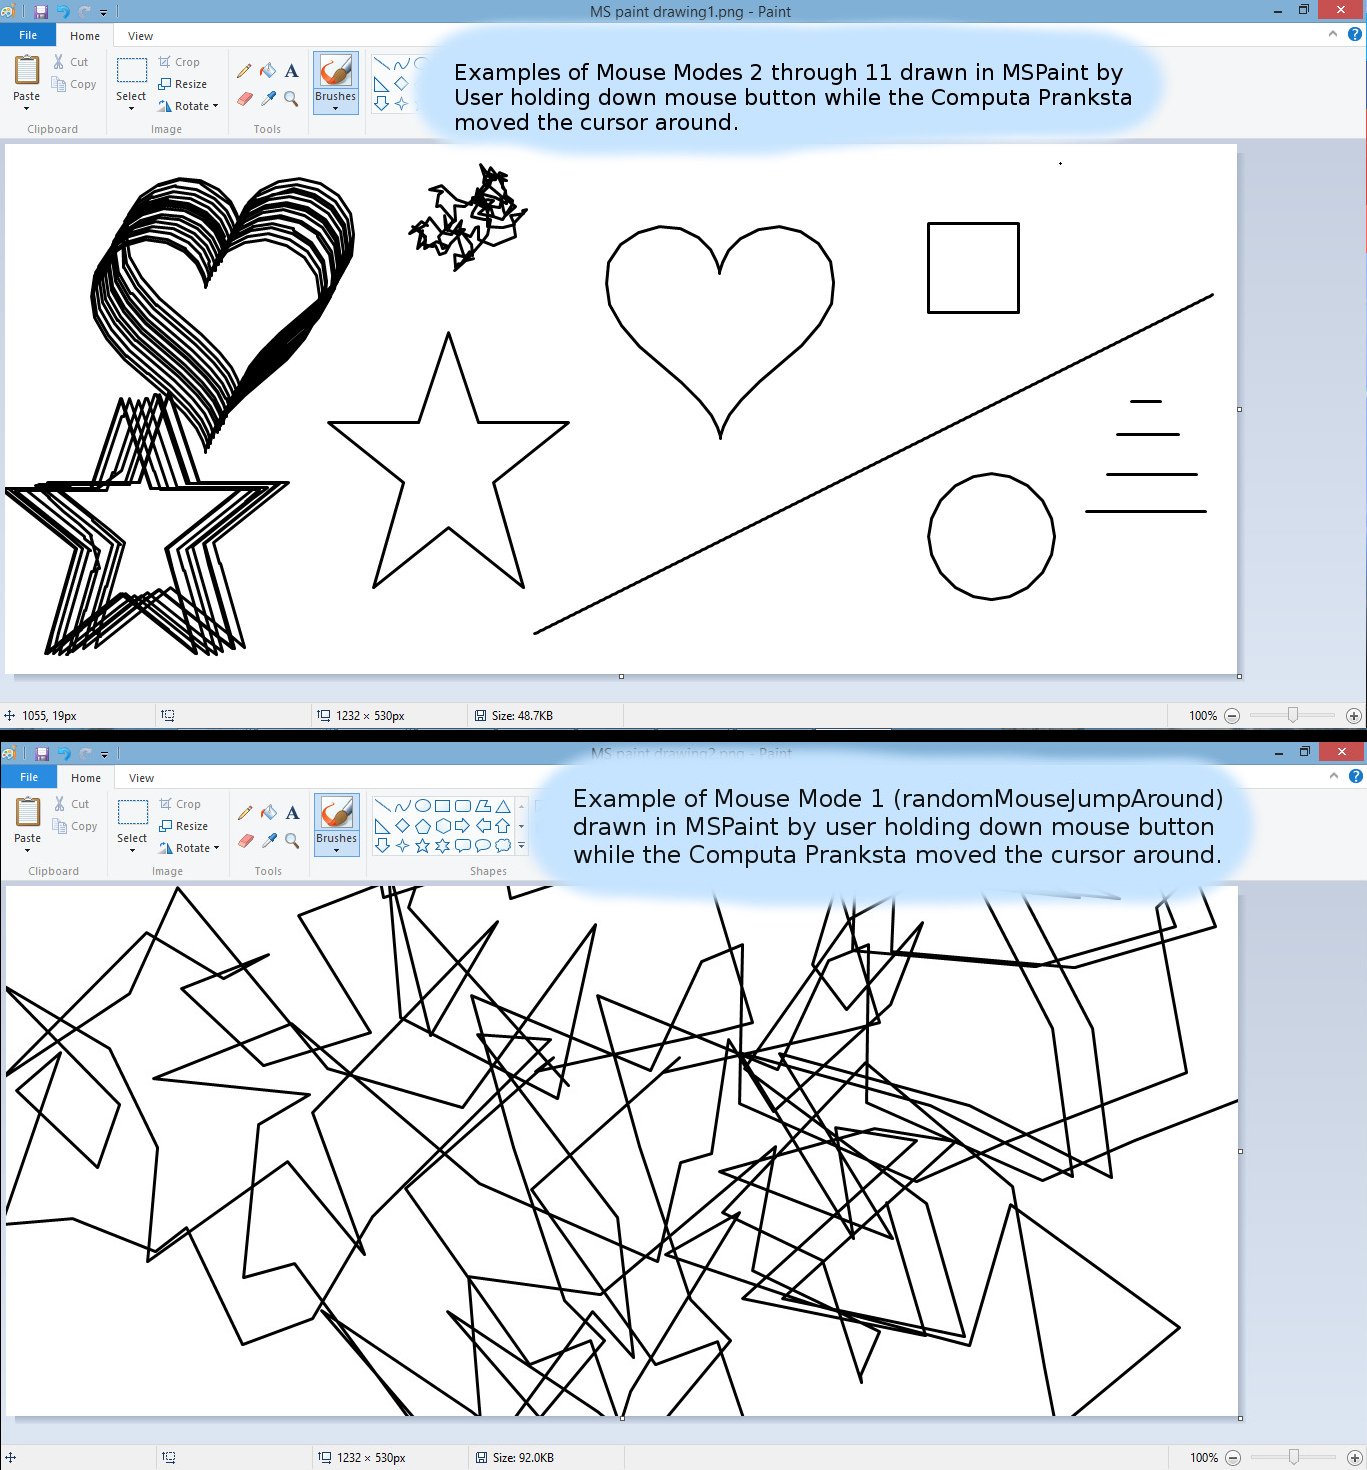
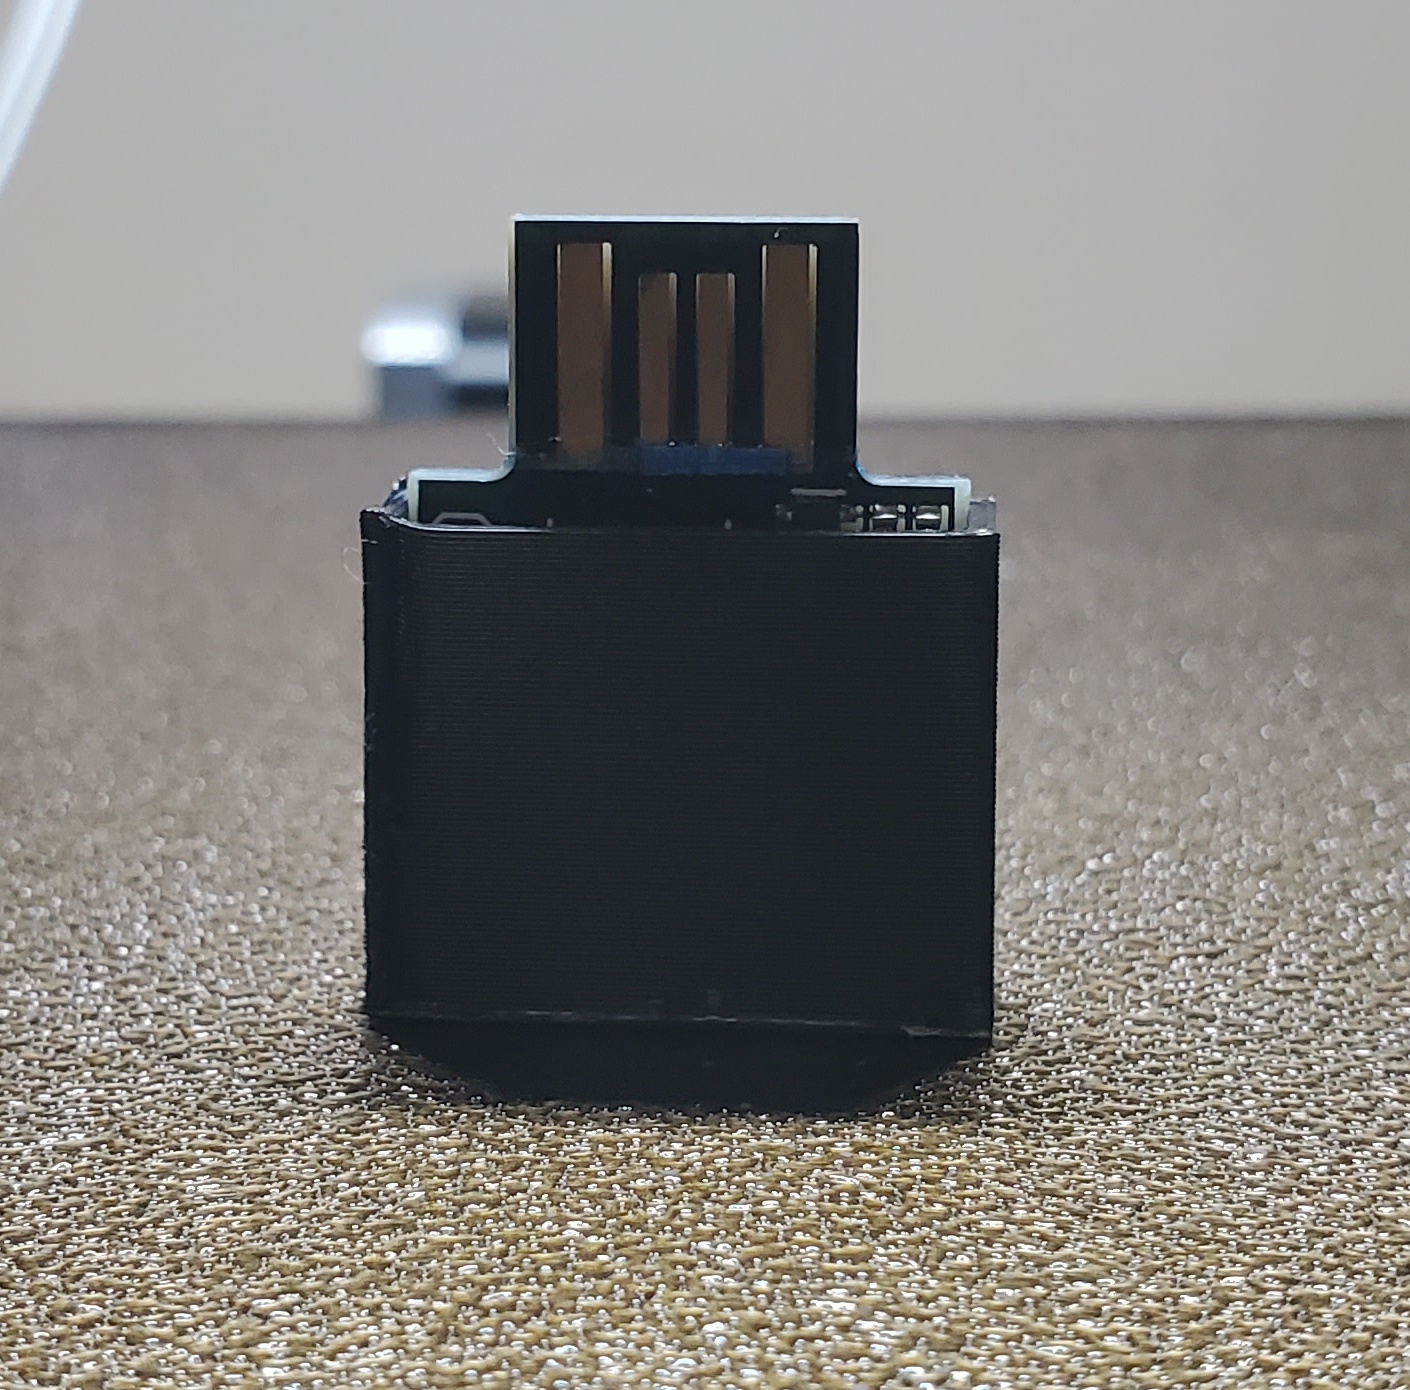
Computa Pranksta Mouse Jiggler now available on Amazon! Click link above or image below to go to Amazon and purchase.
Computa Pranksta User Manual For Device Version: v0.90.0 or later
By Gabriel Staples
Written: 12 Apr. 2017
Last Updated: 9 Feb. 2019 Update History (newest on TOP): -20200908 - added GitHub support page and CAD files for 3D-printed case
-20200214 - copied and pasted my recommended mouse jiggler settings from Amazon -20190209 - added 2nd YouTube video: Reconfiguring the Computa Pranksta for use as a USB Mouse Jiggler to keep your screensaver off -20180505 - added "Quick Reference 'Cheat Sheet'" picture -20180324 - added link to my listing on Ebay too -20171228 - added list of associated keywords to end -20170717 - added YouTube video: "How to Use & Configure..." -20170423 - bug section updated w/some info about Caps Lock Response Mode 10 -20170422 - now available for sale on Amazon! Purchase links added. -20170421 - added images -20170416 - added bug notes; minor additions -20170412 - initial version
Congratulations on your purchase of the Computa Pranksta USB Mouse and Keyboard device. Don't have one yet? Click the link above to purchase it on Amazon. This device is great for playing tricks on your friends, or just for keeping your computer awake when giving presentations, watching movies, playing certain video games (like Real Flight RC simulator) or when you don't have admin rights to change screensaver and screen lock settings.
This devices does NOT require any software or special drivers on your PC. It simply tells the computer it is a standard Human Interface Device mouse and keyboard. If your computer tries to detect a new device and install a driver, don't worry about it--even if it says it "fails." The device will work anyway.
Video 1/2: How to Use & Configure the Computa Pranksta USB Keyboard & Mouse Prank Device
Video 2/2: Reconfiguring the Computa Pranksta for use as a USB Mouse Jiggler to keep your screensaver off:
Here's a quick example of how to make a hardware-based 1us HIGH pulse followed by a 99us LOW pulse (ie: 100us period, or 10kHz, PWM with a 1% duty cycle), via direct timer register manipulation. I've left ample comments for you to read and follow. This example below is therefore quite easy to follow and learn from, but just as it took me dozens of hours originally to learn how to do all this stuff from scratch--and to learn about all the different PWM modes possible as described in the datasheet and elsewhere, expect to spend at least a few hours if you are truly going to read the references and dig into it enough to understand it yourself. Good luck and have fun!
Page Written: 10 Jan 2017
Last Updated: 24 July 2018
UPDATE 24 JULY 2018: I'M TOO BUSY TO DEDICATE THE TIME REQUIRED TO ANY NEW PROJECTS. I'M NO LONGER TAKING NEW PROJECTS AT THIS TIME. SORRY FOR THE INCONVENIENCE.
Hi! My name is Gabriel Staples. I work in the embedded software and robotics industry. Occasionally I take on side projects outside of my day job. For instance, I added custom 2.4GHz wireless control to the Cinemoves Powerslider at a time when off-the-shelf commercial solutions for wireless control of the Powerslider did not exist. This feature I provided enabled them to do special shots in the filming of Mission Impossible 5 and other Hollywood movies. I also built a fire drone for ABC's Battlebots show in 2016.
Cinemoves Powerslider mounted on the side
of a Hollywood stunt car
If you’d like to hire me for custom work, begin by sending me an email. Make the subject line "Custom embedded work--name of project". Not sure if I can handle it? ASK! The worst I'll say is I don't have time, we're not a good fit, or it's out of my area of expertise. See below for details.
Gabriel Staples
Electric RC Aircraft Guy, LLC
(Phone number available upon request by email) PLEASE ONLY USE THE BELOW EMAIL FOR PAID PROJECT REQUESTS. - If you are looking for free advice instead see here.
Related Links:
Click here if you're looking for my generic Contact Me page.
Click here if you're looking for my About Me page.
If you're looking to learn more about me and my background, see my introduction, resume, and LinkedIn profile on my About Me page, and feel free to contact me via my email above.
Hire Me:
If you're looking for some custom firmware/embedded software development and electronics-related engineering work, you've come to the right place.
I am a custom electronics and embedded systems software developer. I design and build custom digital circuits, write code, and use micro-controllers to meet your electronics needs.
If you are using an Arduino for your project, and want your engineers to be able to do the same, I am a perfect fit for the job, as this is my go-to tool of choice.
From building an Unmanned Aerial System (UAS) “drone” (fire-shooting 10-lb hexacopter) that appeared on ABC’s BattleBots in 2016, and designing and producing a camera controller wireless interface board used in the filming of Mission Impossible 5 and other Hollywood movies, to writing my own quadcopter navigation/path planning algorithm from scratch (demo video 1 / demo video 2 / simulation), I have clearly and consistently demonstrated my passion and enthusiasm for solving tough engineering problems.
My intense self-motivation is what sets me apart. I do not limit myself to just what I have been taught, I teach myself when necessary, then I use this knowledge to solve problems others can't. When you hire me, I share my knowledge with you and your engineers and work with you to make your life easier. When I don't know how to do something, I do extensive research, ask questions and figure it out.
Hollywood camera wireless control board
--helped film Mission Impossible 5 and
other Hollywood films, as well as the
2014 Emmy Awards.
If we're not a good fit, I'll say so. 100% satisfaction guaranteed or your money back (details below).
Career supported by a Master of Science degree and vast real-world expertise, with a B.S. in Aeronautical Engineering, graduating Summa Cum Laude from a top university.
By Gabriel Staples
Written: 21 Nov 2016
Last Updated: 21 Nov 2016
Here is a sample code I wrote a couple years ago to command and control a MAX5481 digital potentiometer using SPI commands, including storing commands in the chip's on-board EEPROM (to save the last value written), or not.
In this example you have to type commands into the Arduino Serial Monitor to set the digital potentiometer. I then interpret your serial command you typed, then I send it to the MAX5481 via its defined serial SPI API.
The circuit and hookup is described in full in my comments at the top of my code. If you have any questions please post a comment below and I'll be sure to try and get back to you.
Learning EagleCAD? Here's how to copy a part from one schematic or board layout to another.
Open up an Eagle Control Panel, and the board and schematic you are working on.
Open up a *second* Eagle Control Panel, and the board and schematic you want to copy from.
Use the group tool to make a selection of a part to copy.
Click the copy tool, then ctrl + right click to copy the *grouped* selection to the clipboard. Press Esc now to not paste it anywhere in this project.
Note that you *must* use the group tool followed by ctrl + right click even if only copying a single object, since that's the only way to get it to your PC's clipboard.
Go back to the schematic you'd like to paste into, and click the "paste" tool. Left-click anywhere to paste what's in the clipboard.
So, recently I was introduced to www.PowerElectronicsNews.com by SixtySecondTech, a website which aims to become somewhat of a "website directory that lists quality websites they find valuable and resourceful for the Technology community" (source). As SixtySecondTech grows their database, I hope they can become a good resource to the electronics, maker, Arduino, Raspberry Pi, and other communities.
PowerElectronicsNews is a brand new company who offers "electrical engineering news focused on power and power solutions," including highlighting "solutions and products featuring the latest innovations" in power design. As I continue to grow my skills I hope to be able to apply some of the background knowledge I glean from their articles, so I can use it in real, hands-on projects I can then share and apply instead of just reading a high-level description of it. A few interesting-looking articles of theirs include the following. I have marked with asterisks the articles that particularly interest me. The more asterisks, the better.
For quite some time now I've needed a nice, clean way to post snippets of source code, such as C++, Python, or HTML, on my website here. Finally I decided to figure it out. Here's how it's done. Note that my website is hosted on Google Blogger, but your website on Wordpress or anywhere else should also work just fine with this "SyntaxHighlighter" tool by Alex Gorbatchev that I'm about to present.
By Gabriel Staples
Written: 11 July 2016
Last Updated: 22 Oct 2016 History (newest on top): -posted updated code (v0.2.1) with Linux functions too (not just Windows) - 22 Oct. 2016
Below, I show some code for basic Python millisecond (ms) and microsecond (us)-resolution timing functions. I made these to resemble Arduino functions I am already familiar with. Since these functions use the Windows API's QueryPerformanceCounter and QueryPerformanceFrequency functions, as-written, they work for Python in Windows only. If you decide to adapt them to Linux, please share how you did it in the comments section. Update (19 Oct 2016): I have updated these functions to work with Python in Linux now too! See below.
Functions and code samples. Functions include:
micros()
millis()
delay()
delayMicroseconds()
By Gabriel Staples
Electric RC Aircraft Guy, LLC
Written: 2 July 2016
Last Updated: 21 Jan. 2018 -20180121 - replaced 2016 resume with a 2017 version (still needs a little updating but is much more recent); also changed "Consulting Work" link to say "Custom Embedded Systems Work" instead, since that's a more accurate description -20171014 - corrected "fluent in French" to "conversational in French," and added some detail about it -20170429 - Added/Major updates to "Today" section -20170318 - Updated links; added Consulting Work link, etc -20170110 - Intro updated -20160806 - More comments and notes added about my thesis Version 1; updated resume uploaded.
My name is Gabriel Staples. I strive to make a positive difference in this world by means of robotics, programming, PCB design, small Unmanned Aerial Systems (SUAS) and Vehicles (UAVs), microcontrollers and embedded systems, flight controllers, sensors, electronics, mechatronics, and autonomous systems in general. I seek to be both a thinker and a doer on a daily basis, including at work and in my personal electronics and SUAS-related interests and endeavors at home.
I'm a passionate and enthusiastic engineer who loves to make things work and solve real-world problems.Some may wonder about who I am, my background and experience, etc, so here it is. I'm the owner of and engineer behind Electric RC Aircraft Guy, LLC. At the moment I'm just a one-man shop. I build the website, write the articles, do the projects, write the code, design the PCBs, answer the emails, do the marketing, etc--everything myself. If you'd like me to come work for you as an engineer, contact me, as I'm separating from the US Air Force this fall (approx. Sept. 2017), after achieving both a B.S. and M.S. degree in engineering and serving 7 years as an officer-engineer. The military provided me a great education and foundation for success, and now I am thrilled to be separating in pursuit of my engineering dreams. I thrive on using my engineering and other skills I've built up, and I fully intend to utilize all of my design engineering skills at work too instead of just at home. I'm also fluent in Spanish and conversational in French (I took 6 months French language training for 4~6 hrs/day, originally intending to move to France, in 2015) and love meeting new peoples and cultures and developing and utilizing my language skills, in addition to my engineering skills. I hope to do engineering oversees when given the opportunity too--perhaps even in Toulouse, France, Munich, Germany, or Switzerland, for instance. I'd really like to move overseas and solidify my French someday. A link to download my resume is below. You can find my email by clicking the "Contact Me" tab at the top of this website. To see some of my passion and goals, read my short blurb titled "The Goal of a Lifetime." You should also read how important it is to me to "Aim High."